Canon PowerShot SX50 HS Digital Camera Manual: A Comprehensive Guide
This detailed manual unlocks the full potential of your Canon PowerShot SX50 HS‚ offering guidance from initial setup to advanced photographic techniques‚ ensuring optimal performance.
Explore every feature‚ from its impressive 50x zoom to creative filters‚ and master the art of capturing stunning photos and videos with ease and confidence.
Welcome to the world of advanced photography with the Canon PowerShot SX50 HS! This bridge camera combines a substantial 50x optical zoom with a high-resolution sensor‚ offering versatility for both beginners and experienced photographers.
This manual is designed to be your comprehensive companion‚ guiding you through every aspect of the camera’s operation; It begins with a straightforward unboxing and setup process‚ ensuring a smooth start to your photographic journey.
The SX50 HS distinguishes itself with its robust build and user-friendly interface‚ mirroring the styling of entry-level DSLRs while remaining compact enough for travel. We’ll explore its features‚ shooting modes‚ and advanced settings‚ empowering you to capture exceptional images in various conditions. Prepare to unlock your creative potential!
Unboxing and Initial Setup
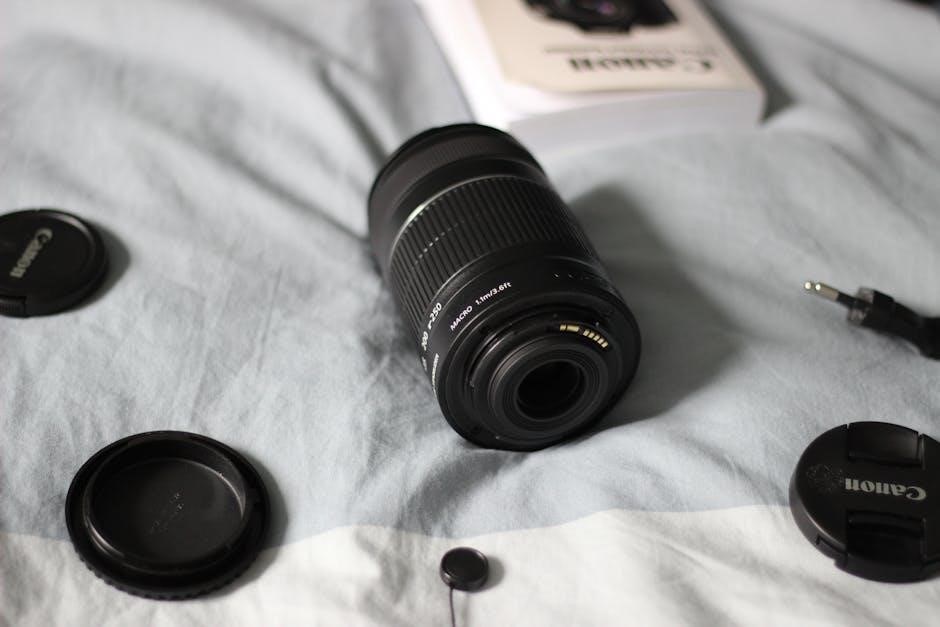
Carefully unpack your Canon PowerShot SX50 HS‚ ensuring all components are present: the camera body‚ battery‚ battery charger‚ AC power cable‚ and this manual. Inspect for any visible damage.
Insert the battery into the designated compartment‚ securing it properly. Connect the battery charger to a power outlet and charge the battery fully before first use – this typically takes several hours.
Insert a compatible SD card into the card slot. Power on the camera using the power button. Follow the on-screen prompts to set the language‚ date‚ and time. Register your product online for warranty benefits and access to future updates. You’re now ready to begin exploring!

Camera Features and Specifications
Discover the PowerShot SX50 HS’s core strengths: a high-resolution sensor‚ powerful 50x optical zoom‚ intelligent image stabilization‚ and a versatile LCD screen for optimal viewing.
Sensor and Image Processor
The Canon PowerShot SX50 HS boasts a 12.1-megapixel CMOS sensor‚ delivering exceptional image quality with fine detail and vibrant colors‚ even in challenging lighting conditions. This sensor size strikes a balance between capturing ample light and maintaining a relatively compact camera body.
Paired with the DIGIC 4+ Image Processor‚ the SX50 HS achieves fast processing speeds‚ enabling quick shooting‚ responsive operation‚ and effective noise reduction. The processor enhances image clarity and minimizes graininess‚ particularly at higher ISO settings.
This combination allows for high-resolution photos and 1080p Full HD video recording‚ ensuring your memories are preserved with remarkable clarity. The sensor and processor work harmoniously to provide a superior imaging experience‚ making the SX50 HS a capable companion for various photographic pursuits.
Zoom Capabilities (50x Optical Zoom)
The Canon PowerShot SX50 HS’s defining feature is its remarkable 50x optical zoom lens‚ offering a versatile focal length range of 21mm to 1050mm (35mm equivalent). This expansive reach allows you to capture everything from wide-angle landscapes to distant subjects with incredible detail‚ without compromising image quality.
Unlike digital zoom‚ optical zoom utilizes the lens’s physical elements to magnify the image‚ preserving sharpness and clarity. The SX50 HS also incorporates Canon’s ZoomPlus technology‚ extending the zoom range further‚ though with some image degradation.
This powerful zoom is ideal for wildlife photography‚ sports events‚ and capturing details that are otherwise inaccessible. The camera’s image stabilization system helps mitigate camera shake at extreme zoom levels‚ ensuring sharper images.
Image Stabilization (IS) System
The Canon PowerShot SX50 HS incorporates a sophisticated Image Stabilization (IS) system‚ crucial for achieving sharp‚ blur-free images and smooth videos‚ especially when utilizing the camera’s powerful 50x optical zoom or shooting in low-light conditions. This system actively compensates for camera shake‚ minimizing the impact of hand movements.
The SX50 HS features a multi-mode IS system‚ offering several stabilization settings tailored to different shooting scenarios. These typically include Standard IS‚ Dynamic IS (for stable videos while walking)‚ and Powered IS‚ which maximizes stabilization effectiveness.
Selecting the appropriate IS mode ensures optimal performance‚ reducing blur and enhancing image clarity. Understanding and utilizing the IS system is key to unlocking the full potential of the SX50 HS‚ particularly when shooting handheld at extended zoom ranges.
LCD Screen and Viewfinder
The Canon PowerShot SX50 HS boasts a bright and clear 3.0-inch Vari-Angle LCD screen‚ providing flexible viewing options for composing shots from various angles. This articulating screen is particularly useful for self-portraits‚ high or low-angle photography‚ and shooting in crowded situations.
In addition to the LCD‚ the SX50 HS features an optical viewfinder‚ offering a traditional shooting experience and conserving battery life. The viewfinder is especially beneficial in bright sunlight where the LCD screen can be difficult to see.
Seamlessly switch between the LCD and viewfinder to adapt to different shooting conditions. Adjusting the LCD brightness and utilizing the viewfinder effectively enhances the overall shooting experience and image quality.

Basic Camera Operations
Mastering fundamental controls is key. This section details powering the camera on/off‚ navigating menus‚ capturing still images‚ and recording videos effortlessly.
Powering On/Off and Mode Dial
To power on your Canon PowerShot SX50 HS‚ locate the power button typically found on the top panel of the camera. A gentle press will initiate the startup sequence‚ displaying the Canon logo and preparing the camera for operation.
The mode dial‚ also situated on top‚ is your primary control for selecting shooting modes. Rotate the dial to access options like Auto‚ Program (P)‚ Aperture Priority (Av)‚ Shutter Priority (Tv)‚ Manual (M)‚ and various Scene Modes.
Ensure the battery is adequately charged for optimal performance. To power off‚ simply press the power button again‚ allowing the camera to safely shut down. Familiarizing yourself with these basic operations will streamline your shooting experience and allow you to quickly adapt to different photographic scenarios.
Navigating the Menu System
Accessing the menu on your Canon PowerShot SX50 HS is done via the MENU button‚ usually located on the rear of the camera. Pressing this button reveals a comprehensive menu system organized into distinct tabs – Shooting‚ AF‚ Setup‚ and others.
Use the directional buttons (or the touchscreen‚ if equipped) to navigate through the menu options. Select a category‚ then scroll to the desired setting. Press the FUNCTION button or the SET button to confirm your selection.
The menu allows customization of numerous camera functions‚ including image quality‚ ISO sensitivity‚ white balance‚ and autofocus settings. Take time to explore each tab to fully understand and personalize your camera’s operation.
Taking Still Photographs
To capture a still image with your Canon PowerShot SX50 HS‚ first ensure the camera is set to a still photography mode using the Mode Dial (Auto‚ P‚ Av‚ Tv‚ M‚ or Scene modes). Compose your shot using the LCD screen or viewfinder.
Half-press the shutter button to activate autofocus and auto-exposure. The camera will lock focus on the subject. Once focus is confirmed‚ fully press the shutter button to capture the photograph.
Review the image immediately on the LCD screen. Utilize the playback buttons to zoom in‚ check sharpness‚ and delete unwanted photos. Experiment with different shooting modes and settings to achieve desired results.
Recording Videos
To begin recording video with your Canon PowerShot SX50 HS‚ rotate the Mode Dial to the video camera icon. Press the shutter button once to start recording; a red recording indicator will appear on the LCD screen. Zoom functionality is available during video recording‚ utilizing the surrounding zoom lever.
Press the shutter button again to stop recording. Review the recorded video using the playback functions. The SX50 HS supports various video resolutions and frame rates‚ adjustable within the menu settings.
Consider using the image stabilization feature to minimize camera shake during handheld video recording. Experiment with different scene modes optimized for video to enhance your footage.

Understanding Shooting Modes
The Canon SX50 HS offers diverse shooting modes‚ ranging from fully automatic simplicity to complete manual control‚ empowering users to tailor settings to any photographic scenario.
Auto Mode (Easy Mode)
Canon’s Auto Mode‚ also known as Easy Mode‚ is designed for absolute beginners or those seeking effortless photography. This mode automatically handles all camera settings – aperture‚ shutter speed‚ ISO‚ and white balance – allowing you to simply point and shoot.
It’s the ideal choice for everyday snapshots‚ ensuring well-exposed and properly focused images in most lighting conditions. The camera intelligently analyzes the scene and selects the optimal settings‚ minimizing the need for technical knowledge.
To activate Easy Mode‚ simply rotate the Mode Dial to the ‘Easy’ setting (often indicated by a flower icon). The camera’s interface will simplify‚ displaying only essential information. While offering convenience‚ remember that Easy Mode provides limited creative control.
Program Mode (P)
Program Mode (P) offers a balance between automatic convenience and creative control. Unlike Auto Mode‚ Program Mode allows you to adjust certain settings while the camera automatically manages aperture and shutter speed for optimal exposure.
You can modify ISO sensitivity‚ white balance‚ exposure compensation‚ and flash settings‚ giving you more influence over the final image. This mode is excellent for situations where you want to fine-tune the look of your photos without fully committing to manual settings.
To select Program Mode‚ rotate the Mode Dial to ‘P’. The LCD screen will display adjustable parameters‚ allowing you to customize your shooting experience. It’s a great stepping stone towards mastering more advanced modes.
Aperture Priority Mode (Av)
Aperture Priority Mode (Av) grants you control over the lens aperture‚ directly influencing the depth of field in your photographs. The camera automatically selects the appropriate shutter speed to achieve correct exposure‚ simplifying the process.
A wider aperture (lower f-number) creates a shallow depth of field‚ ideal for portraits with blurred backgrounds‚ while a narrower aperture (higher f-number) maximizes depth of field‚ perfect for landscapes.
To engage Av mode‚ turn the Mode Dial to ‘Av’. Use the control dial to adjust the aperture value. Experimenting with different apertures will dramatically alter the aesthetic of your images‚ offering creative flexibility;

Shutter Priority Mode (Tv)
Shutter Priority Mode (Tv) empowers you to dictate the shutter speed‚ controlling how motion is captured in your images. The camera automatically adjusts the aperture to maintain proper exposure‚ streamlining the shooting process.
Fast shutter speeds freeze motion‚ perfect for sports or wildlife photography‚ while slow shutter speeds blur motion‚ creating a sense of movement or light trails.
To activate Tv mode‚ rotate the Mode Dial to ‘Tv’. Utilize the control dial to adjust the shutter speed. Mastering shutter speed allows you to creatively depict action and achieve unique visual effects‚ enhancing your photographic storytelling.

Manual Mode (M)
Manual Mode (M) grants you complete creative control over both aperture and shutter speed‚ allowing for precise exposure adjustments. This mode is ideal for experienced photographers seeking ultimate customization and artistic expression.
In M mode‚ the camera doesn’t automatically adjust settings; you independently control both aperture (f-stop) and shutter speed. Use the control dial to adjust each setting‚ observing the exposure indicator to achieve the desired brightness.
Mastering Manual Mode requires understanding the relationship between aperture‚ shutter speed‚ and ISO. It unlocks the full potential of your Canon PowerShot SX50 HS‚ enabling you to capture images exactly as envisioned.
Scene Modes (Portrait‚ Landscape‚ Sports‚ etc.)
Canon’s PowerShot SX50 HS offers a variety of pre-set Scene Modes designed to optimize camera settings for specific shooting situations‚ simplifying photography for various environments.
Portrait mode softens backgrounds and emphasizes the subject’s face‚ while Landscape mode maximizes depth of field for sharp‚ detailed scenery. Sports mode utilizes a faster shutter speed to freeze motion‚ perfect for action shots.
Other available modes include Night‚ Snow‚ Beach‚ Foliage‚ and more‚ each tailored to deliver optimal results in challenging conditions. These modes are accessible through the mode dial‚ offering convenience and improved image quality without manual adjustments.

Focusing and Exposure
Master precise image capture with the SX50 HS’s autofocus options and exposure controls‚ allowing you to achieve sharp‚ well-lit photographs in diverse conditions.
Autofocus Modes (Single‚ Continuous‚ Face Detection)
The Canon PowerShot SX50 HS offers versatile autofocus modes to suit various shooting scenarios. Single AF is ideal for stationary subjects‚ locking focus when the shutter button is half-pressed. Continuous AF‚ conversely‚ tracks moving subjects‚ constantly adjusting focus for sharp results during action sequences.
Face Detection AF intelligently identifies and focuses on faces within the frame‚ ensuring portraits are crisp and clear. This mode prioritizes faces‚ even in crowded scenes. You can select from multiple faces if several are present. The camera automatically optimizes settings for portrait photography when this mode is engaged.
Switching between these modes is easily done through the camera’s menu system‚ providing photographers with the flexibility to adapt to changing conditions and capture the perfect shot‚ consistently.
Focus Lock and Manual Focus
Focus Lock allows you to maintain focus on a specific subject even if you recompose the shot. Half-press the shutter button to lock focus‚ then reframe your image while keeping the button pressed. This is particularly useful when shooting subjects not directly in the center of the frame.
For precise control‚ the SX50 HS offers Manual Focus (MF). Accessed through the mode dial‚ MF lets you adjust focus using the directional buttons or the focus ring on the lens. This is invaluable for macro photography or situations where autofocus struggles‚ like low-light conditions or through obstructions.
Magnifying the image on the LCD screen during manual focus assists in achieving critical sharpness. Remember to switch back to autofocus for general shooting to leverage the camera’s speed and convenience.
Exposure Compensation
Exposure Compensation allows you to fine-tune the brightness of your images‚ overriding the camera’s automatic metering. When the camera underestimates or overestimates the correct exposure‚ use this feature to adjust accordingly.
The SX50 HS offers a +/- 3 stop range‚ displayed in EV (Exposure Value) steps. Positive values (+1‚ +2‚ +3) brighten the image‚ useful for dark subjects‚ while negative values (-1‚ -2‚ -3) darken it‚ ideal for bright scenes like snow.
Access Exposure Compensation through the Quick Control screen or menu. Observe the effect on the LCD screen and adjust until you achieve the desired brightness. Remember to reset to 0 EV for standard shooting conditions.
ISO Sensitivity Settings
ISO determines your camera’s sensitivity to light. Lower ISO settings (e.g.‚ ISO 100) produce cleaner images with less noise‚ ideal for bright conditions. Higher ISO settings (e.g.‚ ISO 3200) allow shooting in low light‚ but introduce more noise or grain.
The Canon PowerShot SX50 HS offers an ISO range of 80 to 3200‚ plus an Auto ISO mode. Auto ISO lets the camera select the optimal ISO based on the shooting environment.
Access ISO settings through the menu. For static subjects in good light‚ use a low ISO. For fast-moving subjects or low light‚ increase the ISO‚ balancing brightness with image quality. Experiment to find the best setting for your needs.
Advanced Features and Settings
Unlock your creative vision with features like creative filters‚ custom white balance‚ and an ND filter‚ enhancing image control and artistic expression.
Creative Filters
The Canon PowerShot SX50 HS offers a range of Creative Filters to instantly transform the look and feel of your images directly within the camera. These filters provide a quick and easy way to add artistic effects without needing post-processing software.
Available options include Fish-eye‚ Miniature‚ Toy Camera‚ Soft Focus‚ Monochrome‚ Sepia‚ and more. Each filter alters the image characteristics‚ such as color‚ contrast‚ and sharpness‚ to create a unique aesthetic.
To apply a Creative Filter‚ simply select it from the camera’s menu before taking a photograph. You can preview the effect on the LCD screen in real-time. Experiment with different filters to discover the perfect style for your subject and vision‚ adding a personalized touch to your photography.
Custom White Balance
Achieving accurate color reproduction is crucial for high-quality photography‚ and the Canon PowerShot SX50 HS allows for precise control with its Custom White Balance feature. This function enables you to manually set the white balance based on the specific lighting conditions of your scene.
To set a Custom White Balance‚ photograph a white or gray card under the prevailing light. The camera then uses this reference to calibrate its color settings‚ ensuring that white objects appear truly white in your images.
This is particularly useful in challenging lighting situations where automatic white balance may struggle‚ such as under fluorescent or incandescent lights. Utilizing Custom White Balance guarantees natural and accurate colors‚ enhancing the overall quality of your photographs.
ND Filter
The Canon PowerShot SX50 HS incorporates a built-in Neutral Density (ND) filter‚ a valuable tool for photographers seeking creative control over their images‚ especially in bright lighting conditions. This filter reduces the amount of light entering the camera lens without affecting color.
Utilizing the ND filter allows for wider apertures to be used in bright sunlight‚ creating a shallow depth of field and beautiful background blur (bokeh). It also enables slower shutter speeds‚ perfect for capturing motion blur in waterfalls or moving subjects.
The SX50 HS offers multiple ND filter settings‚ providing varying degrees of light reduction. Experimenting with these settings unlocks artistic possibilities and expands your photographic expression‚ even in challenging environments.
Digital Zoom
The Canon PowerShot SX50 HS features a digital zoom function‚ extending the camera’s reach beyond its impressive 50x optical zoom. However‚ it’s crucial to understand the implications of using digital zoom for optimal image quality.
Unlike optical zoom‚ which uses the lens’s physical focal length‚ digital zoom simply crops and enlarges the image‚ effectively reducing the resolution. While convenient for getting closer to a subject‚ excessive digital zoom can result in noticeable pixelation and loss of detail.
The SX50 HS allows you to control the level of digital zoom. It’s recommended to use it sparingly and only when absolutely necessary‚ prioritizing optical zoom whenever possible to maintain the highest image quality. Consider cropping in post-processing for better results.

Connectivity and Data Transfer
Seamlessly connect your Canon PowerShot SX50 HS via USB or HDMI to computers and displays‚ facilitating effortless image and video transfer and viewing experiences.
Connecting to a Computer (USB)
Establishing a USB connection between your Canon PowerShot SX50 HS and a computer allows for quick and reliable data transfer of your captured photos and videos. Begin by ensuring your camera is powered off before connecting the provided USB cable.
Plug the USB cable securely into the camera’s USB port and the corresponding USB port on your computer. Power on the camera; it should automatically detect the connection and display options on the LCD screen.
Select “Transfer Images” or a similar option from the camera’s menu. Your computer will recognize the camera as a removable storage device. You can then browse the camera’s folders and copy the desired files to your computer’s hard drive.
Remember to safely eject the camera from your computer before disconnecting the USB cable to prevent data corruption. This ensures a smooth and secure transfer process.
HDMI Output
The Canon PowerShot SX50 HS features an HDMI output‚ enabling you to view your photos and videos on a larger screen‚ such as a high-definition television or monitor. To connect‚ you’ll need a standard HDMI cable (not always included).
Plug one end of the HDMI cable into the camera’s HDMI port and the other end into the HDMI input on your TV or monitor. Select the correct HDMI input source on your TV using its remote control.
Power on the camera and navigate to the camera’s menu. Choose the HDMI output setting‚ typically found under display or video output options. Ensure the resolution matches your TV’s capabilities for optimal viewing.
Enjoy sharing your memories in stunning high-definition! Adjust camera settings as needed for the best picture quality on your external display.
SD Card Management
Your Canon PowerShot SX50 HS utilizes SD cards for storing photos and videos. Proper SD card management is crucial for optimal performance and preventing data loss. The camera supports SD‚ SDHC‚ and SDXC card formats; check the card’s compatibility before use.
To insert a card‚ locate the SD card slot (usually on the side of the camera) and gently insert the card until it clicks. To remove‚ press the card inward to release it. Always format the card within the camera for best results‚ using the format option in the menu.
Regularly back up your photos and videos to a computer or cloud storage to safeguard your precious memories. Delete unwanted files directly from the camera to free up space‚ but exercise caution!